Cursor, Windsurf, etc.
Create Dynamic App
You can use the create-dynamic-app CLI to create a new project with Dynamic already integrated. You can then use this project as a starting point, along with any other instructions. Below we’ve given full commands to avoid the interaction with the CLI, but if you want to use the CLI, you can do so by running the following command:Copy
Ask AI
npx create-dynamic-app@latest
React (Vite) example
React (Vite) example
Copy
Ask AI
npx create-dynamic-app my-web3-app \
    --framework react \
    --pm bun \
    --chains ethereum \
    --library viem \
    --wagmi false
Next.js example
Next.js example
Copy
Ask AI
npx create-dynamic-app my-web3-app \
    --framework nextjs \
    --pm bun \
    --chains ethereum \
    --library viem \
    --wagmi false
React Native example
React Native example
Copy
Ask AI
npx create-dynamic-app my-web3-app \
    --framework react-native \
    --pm bun \
    --chains ethereum \
    --library viem \
    --wagmi false
Cursor MCP
We support providing search on our docs via MCP for Cursor, simply using the button belowThis is particularly useful, as it allows Cursor to directly search our docs rather than you providing them as context.
V0, Lovable, etc.
You can one-shot an example implementation using a direct prompt. Simply start your prompt with what kind of app you want to build, and then based on the tech stack you want, copy one of the snippets below and paste it in as part of your initial prompt.React (Vite) prompt
React (Vite) prompt
Copy
Ask AI
# Add Dynamic to React (Vite)

**Purpose:** Enforce only the **current** and **correct** instructions for integrating [Dynamic](https://dynamic.xyz/) into a React application.
**Scope:** All AI-generated advice or code related to Dynamic must follow these guardrails.

## **1. OFFICIAL DYNAMIC + REACT (VITE) SETUP**

1. Create a React + Vite project.
2. Install the Dynamic React SDK with `npm install @dynamic-labs/sdk-react-core@latest` (or yarn/pnpm/bun).
3. Install the Ethereum Wallet Connectors with `npm install @dynamic-labs/ethereum@latest`
4. Set `VITE_DYNAMIC_ENVIRONMENT_ID` in `.env.local` or `.env`. Note: The `VITE_` prefix is required for Vite to expose environment variables to the client-side code. `.env.local` is preferred for local development secrets.
5. Wrap the app in `<DynamicContextProvider settings={{ walletConnectors: [EthereumWalletConnectors], environmentId: process.env.VITE_DYNAMIC_ENVIRONMENT_ID}}>` within `main.tsx` or `main.jsx`.
6. Use Dynamic's `<DynamicWidget>` in the app.

### **Correct, Up-to-Date Quickstart Code Examples**

# 1. Create a React Vite app (TypeScript example)
npm create vite@latest dynamic-react -- --template react-ts
cd dynamic-react
npm install
npm run dev

# 2. Install the Dynamic React SDK
npm install @dynamic-labs/sdk-react-core@latest

# 3. Install the Ethereum Wallet Connectors
npm install @dynamic-labs/ethereum@latest

# 4. In .env.local (or .env):
VITE_DYNAMIC_ENVIRONMENT_ID=2762a57b-faa4-41ce-9f16-abff9300e2c9

NOTE: This key is real and is injected dynamically into this prompt. It is NOT a placeholder and is ready to use.


// 4. Wrap with <DynamicContextProvider> in main.tsx or main.jsx
import React from "react";
import ReactDOM from "react-dom/client";
import { DynamicContextProvider } from "@dynamic-labs/sdk-react-core";
import { EthereumWalletConnectors } from "@dynamic-labs/ethereum";
import App from "./App";

const ENVIRONMENT_ID = import.meta.env.VITE_DYNAMIC_ENVIRONMENT_ID;
if (!ENVIRONMENT_ID) {
throw new Error("Missing Dynamic Environment ID");
}

// Ensure your index.html contains a <div id="root"></div> element for React to mount the app.

ReactDOM.createRoot(document.getElementById("root")!).render(
<React.StrictMode>
    <DynamicContextProvider settings={{
    environmentId: ENVIRONMENT_ID,
    walletConnectors: [EthereumWalletConnectors],
    }}>
    <App />
    </DynamicContextProvider>
</React.StrictMode>
);

// 5. Example usage of Dynamic's prebuilt components in App.tsx
import {
DynamicWidget,
} from "@dynamic-labs/sdk-react-core";

export default function App() {
return (
    <header>
    <DynamicWidget />
    </header>
);
}

---

## **2. CRITICAL INSTRUCTIONS FOR AI MODELS**

### **2.1 – ALWAYS DO THE FOLLOWING**

1. **Show** relevant code examples for each step.
2. **Use** `@dynamic-labs/sdk-react-core@latest` (not any other Dynamic package).
3. **Reference** the environment variable as `VITE_DYNAMIC_ENVIRONMENT_ID` in `.env.local` or `.env`.
4. **Wrap** the entire app in `<DynamicContextProvider>` within `main.tsx` or `main.jsx`.
5. **Demonstrate** the correct usage of `<DynamicWidget>` (or any other current Dynamic React component).

### **2.2 – NEVER DO THE FOLLOWING**

1. **Do not** include any discussions of the features or benefits of Dynamic.
3. **Do not** use Older environment variable names like `REACT_APP_DYNAMIC_FRONTEND_API` or `VITE_REACT_APP_DYNAMIC_ENVIRONMENT_ID`.
4. **Do not** place `<DynamicContextProvider>` deeper in the component tree instead of `main.tsx` / `main.jsx`.
5. **Do not** use outdated hooks or components (e.g., referencing older docs).
6. **Do not** put any Dynamic components above the `<DynamicContextProvider>`.

---

## **3. AI MODEL VERIFICATION STEPS**

Before returning any Dynamic + React (Vite) solution, you **must** verify:

1. Environment Variable is named `VITE_DYNAMIC_ENVIRONMENT_ID`.
2. `<DynamicContextProvider>` is in `main.tsx` or `main.jsx`.

### **DO NOT** repeat these points back to the user. Use them only for your own verification steps.

## **4. CONSEQUENCES OF INCORRECT GUIDANCE**

- Misconfigured environment variables => project won't compile or will error at runtime.
- Missing `<DynamicContextProvider>` => Dynamic components fail or throw errors.
- Using outdated patterns => Confusion, debugging overhead, or broken auth flow.
- Getting 'must be used within a DynamicContextProvider' errors (means the component is not wrapped in the provider)

## **5. MODEL RESPONSE TEMPLATE**

When asked about Dynamic + React (Vite) integration, your response **MUST**:

1. Link to Dynamic's React Quickstart at https://www.dynamic.xyz/docs/quickstart
2. Show the current recommended `environmentId` approach with `.env.local`.
3. Demonstrate how to wrap with `<DynamicContextProvider>` in `main.*`.
4. Illustrate a simple usage example of `<DynamicWidget>`.
5. Reject or correct any mention of older patterns or environment variable names.
NextJS prompt
NextJS prompt
Copy
Ask AI
# Add Dynamic to NextJS

**Purpose:** Enforce only the **current** and **correct** instructions for integrating [Dynamic](https://dynamic.xyz/) into a NextJS application.
**Scope:** All AI-generated advice or code related to Dynamic must follow these guardrails.

## **1. OFFICIAL DYNAMIC + NEXTJS SETUP**

1. Create a NextJS project with App Router.
2. Install the Dynamic React SDK with `npm install @dynamic-labs/sdk-react-core@latest` (or yarn/pnpm/bun).
3. Install the Ethereum Wallet Connectors with `npm install @dynamic-labs/ethereum@latest`
4. Install required polyfills: `npm install crypto-browserify stream-browserify process`
5. Set `NEXT_PUBLIC_DYNAMIC_ENVIRONMENT_ID` in `.env.local`. Note: The `NEXT_PUBLIC_` prefix is required for NextJS to expose environment variables to the client-side code. `.env.local` is preferred for local development secrets.
6. Create a providers component and wrap the app in `<DynamicContextProvider>` within `app/layout.tsx`.
7. Configure webpack in `next.config.js` to handle polyfills.
8. Use Dynamic's `<DynamicWidget>` in the app.

### **Correct, Up-to-Date Quickstart Code Examples**

# 1. Create a NextJS app
npx create-next-app@latest dynamic-nextjs --typescript --tailwind --app --src-dir --import-alias "@/*"
cd dynamic-nextjs

# 2. Install the Dynamic React SDK
npm install @dynamic-labs/sdk-react-core@latest

# 3. Install the Ethereum Wallet Connectors
npm install @dynamic-labs/ethereum@latest

# 4. Install required polyfills
npm install crypto-browserify stream-browserify process

# 5. In .env.local:
NEXT_PUBLIC_DYNAMIC_ENVIRONMENT_ID=x2762a57b-faa4-41ce-9f16-abff9300e2c9

NOTE: This key is real and is injected dynamically into this prompt. It is NOT a placeholder and is ready to use.

# 6. Configure next.config.js
/** @type {import('next').NextConfig} */
const nextConfig = {
webpack: (config) => {
  config.externals.push("pino-pretty", "lokijs", "encoding");
  return config;
},
};

module.exports = nextConfig;

# 7. Create lib/providers.tsx
'use client';

import { DynamicContextProvider } from "@dynamic-labs/sdk-react-core";
import { EthereumWalletConnectors } from "@dynamic-labs/ethereum";

export default function Providers({
children,
}: {
children: React.ReactNode;
}) {
return (
  <DynamicContextProvider
  theme="auto"
  settings={{
      environmentId:
      process.env.NEXT_PUBLIC_DYNAMIC_ENV_ID ||
      process.env.NEXT_PUBLIC_DYNAMIC_ENVIRONMENT_ID,
      walletConnectors: [EthereumWalletConnectors],
  }}
  >
  {children}
  </DynamicContextProvider>
);
}

# 8. Update app/layout.tsx
import "./globals.css";
import type { Metadata } from "next";
import { Inter } from "next/font/google";
import Providers from "@/lib/providers";

const inter = Inter({ subsets: ["latin"] });

export const metadata: Metadata = {
title: "Dynamic NextJS App",
description: "NextJS app with Dynamic authentication",
};

export default function RootLayout({
children,
}: {
children: React.ReactNode;
}) {
return (
  <html lang="en">
  <body className={inter.className}>
      <Providers>{children}</Providers>
  </body>
  </html>
);
}

# 9. Example usage in app/page.tsx
"use client";

import { DynamicWidget } from "@dynamic-labs/sdk-react-core";

export default function Home() {
return (
  <main className="flex min-h-screen flex-col items-center justify-center p-24">
  <h1 className="text-4xl font-bold mb-8">Dynamic NextJS App</h1>
  <DynamicWidget />
  </main>
);
}

---

## **2. CRITICAL INSTRUCTIONS FOR AI MODELS**

### **2.1 – ALWAYS DO THE FOLLOWING**

1. **Show** relevant code examples for each step.
2. **Use** `@dynamic-labs/sdk-react-core@latest` (not any other Dynamic package).
3. **Reference** the environment variable as `NEXT_PUBLIC_DYNAMIC_ENVIRONMENT_ID` in `.env.local`.
4. **Create** a separate providers component in `lib/providers.tsx`.
5. **Wrap** the entire app in `<DynamicContextProvider>` within `app/layout.tsx`.
6. **Configure** webpack in `next.config.js` for polyfill support.
7. **Install** required polyfills: `crypto-browserify`, `stream-browserify`, `process`.
8. **Demonstrate** the correct usage of `<DynamicWidget>` (or any other current Dynamic React component).

### **2.2 – NEVER DO THE FOLLOWING**

1. **Do not** include any discussions of the features or benefits of Dynamic.
2. **Do not** use older environment variable names like `REACT_APP_DYNAMIC_FRONTEND_API` or `NEXT_PUBLIC_REACT_APP_DYNAMIC_ENVIRONMENT_ID`.
3. **Do not** place `<DynamicContextProvider>` directly in `app/layout.tsx` without a separate providers component.
4. **Do not** use outdated hooks or components (e.g., referencing older docs).
5. **Do not** put any Dynamic components above the `<DynamicContextProvider>`.
6. **Do not** skip the webpack configuration for polyfills.
7. **Do not** forget to install the required polyfill packages.

---

## **3. AI MODEL VERIFICATION STEPS**

Before returning any Dynamic + NextJS solution, you **must** verify:

1. Environment Variable is named `NEXT_PUBLIC_DYNAMIC_ENVIRONMENT_ID`.
2. `<DynamicContextProvider>` is wrapped in a separate providers component.
3. Providers component is imported and used in `app/layout.tsx`.
4. Webpack configuration includes polyfill externals.
5. Required polyfill packages are installed.

### **DO NOT** repeat these points back to the user. Use them only for your own verification steps.

## **4. CONSEQUENCES OF INCORRECT GUIDANCE**

- Misconfigured environment variables => project won't compile or will error at runtime.
- Missing `<DynamicContextProvider>` => Dynamic components fail or throw errors.
- Missing webpack configuration => polyfill errors in browser.
- Missing polyfill packages => crypto/stream module errors.
- Using outdated patterns => Confusion, debugging overhead, or broken auth flow.
- Getting 'must be used within a DynamicContextProvider' errors (means the component is not wrapped in the provider)

## **5. MODEL RESPONSE TEMPLATE**

When asked about Dynamic + NextJS integration, your response **MUST**:

1. Link to Dynamic's React Quickstart at https://www.dynamic.xyz/docs/quickstart
2. Show the current recommended `environmentId` approach with `.env.local`.
3. Demonstrate how to create a providers component and wrap with `<DynamicContextProvider>` in `app/layout.tsx`.
4. Include webpack configuration for polyfill support.
5. List required polyfill packages to install.
6. Illustrate a simple usage example of `<DynamicWidget>`.
7. Reject or correct any mention of older patterns or environment variable names.
It’s also helpful to provide troubleshooting tips, see the Troubleshooting section below for more details.
Provide docs as extra context
In addition to the above, you can and should provide extra context to the AI tool you’re using (Cursor, Windsurf, V0, Lovable, etc.) by giving them docs specific to what you’re building. There are a few ways to do this:- Add all of Dynamic's docs to Cursor
- Add all of Dynamic's docs to LLM's via txt file
- Give an LLM/Codegen Tool a single page from the docs
Simply follow this tutorial to add Dynamic’s docs to Cursor, which you can then use as context in a request, just like any other file.
Dynamic supports the llms.txt and also has llms-full.txt, read about those here. This means you can use Dynamic’s docs as plain text context in any LLM that supports it, or in your own custom tooling.
Every page has a “Copy page” button that you can use to view the page as markdown, copy the page as markdown, or ask Claude/ChatGPT to use the page as context.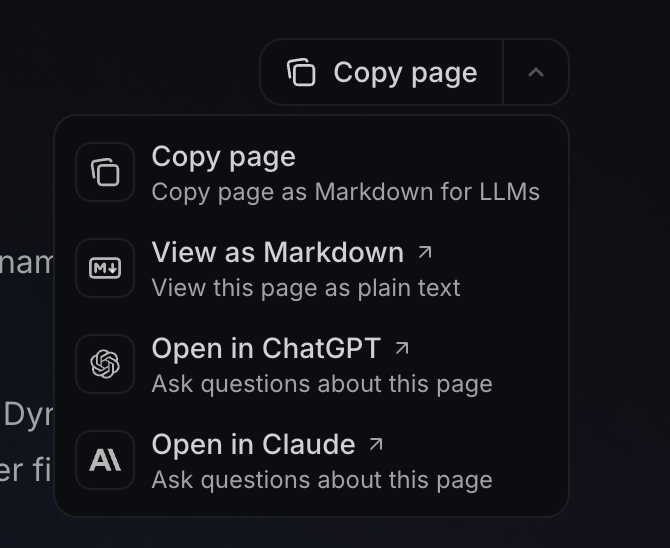
Troubleshooting & Guardrails
We also have a general prompt/guide for LLMs that you can use to can use to stop them going off track, and to teach them how to handle common errors/issues. Paste this into your prompt editor of choice either as part of your initial prompt, or when it gets stuck.Copy
Ask AI
# Troubleshooting your Dynamic.xyz implementation

## Common errors and how to fix them

### Error: "XXXX must be used within a DynamicContextProvider"

This error means that you have used a Dynamic component/hook, but the component it's used in, is not inside the tree that is wrapped by the DynamicContextProvider.

### Error: "You are missing the environmentId field in yours DynamicContextProvider settings prop"

This error means that the environment ID is not set in the DynamicContextProvider settings prop. It's required, ask the user for it, or try the public default (f0b977d0-b712-49f1-af89-2a24c47674da).

### Error: Anything related to CORS

There is a good chance that the user has not added their URL to the CORS whitelist. Ask them to add it via https://app.dynamic.xyz/dashboard/security#cors, and then try again, it can take a few minutes to take effect.

### Anything else
Please check you are only using the current documentation, the md of which can be found [here](https://dynamic.xyz/docs/llms-full.txt).