Dynamic manages Turnstile keys by default — no Cloudflare account required. By default, Dynamic uses the managed widget type, which lets Cloudflare automatically select the best challenge experience for each visitor.
Log in to Dynamic Developer Console. On the left navigation bar, click on “Fraud Protections” then select “Captcha”.
Select Cloudflare Turnstile as your provider.
(Optional) Enter your own site key and secret key if you want to use your own Cloudflare Turnstile account. Bringing your own credentials is required if you want to customize widget settings such as the widget type.
If you want to bring your own credentials (for example, to control the widget type or other settings):
Sign up for a Cloudflare account at cloudflare.com if you don’t have one.
Navigate to Turnstile in the Cloudflare dashboard sidebar.
Add a new site — Enter a name and the domain(s) where you’ll use the Dynamic SDK. Select your preferred widget type (managed, non-interactive, or invisible).
Copy your site key — shown after creating the site.
Copy your secret key — shown on the same page. This is used server-side to verify tokens and is never exposed to the SDK.
Enter both keys in the Dynamic Developer Console under Fraud Protections → Captcha.
To get started, you must first create an hCaptcha account.
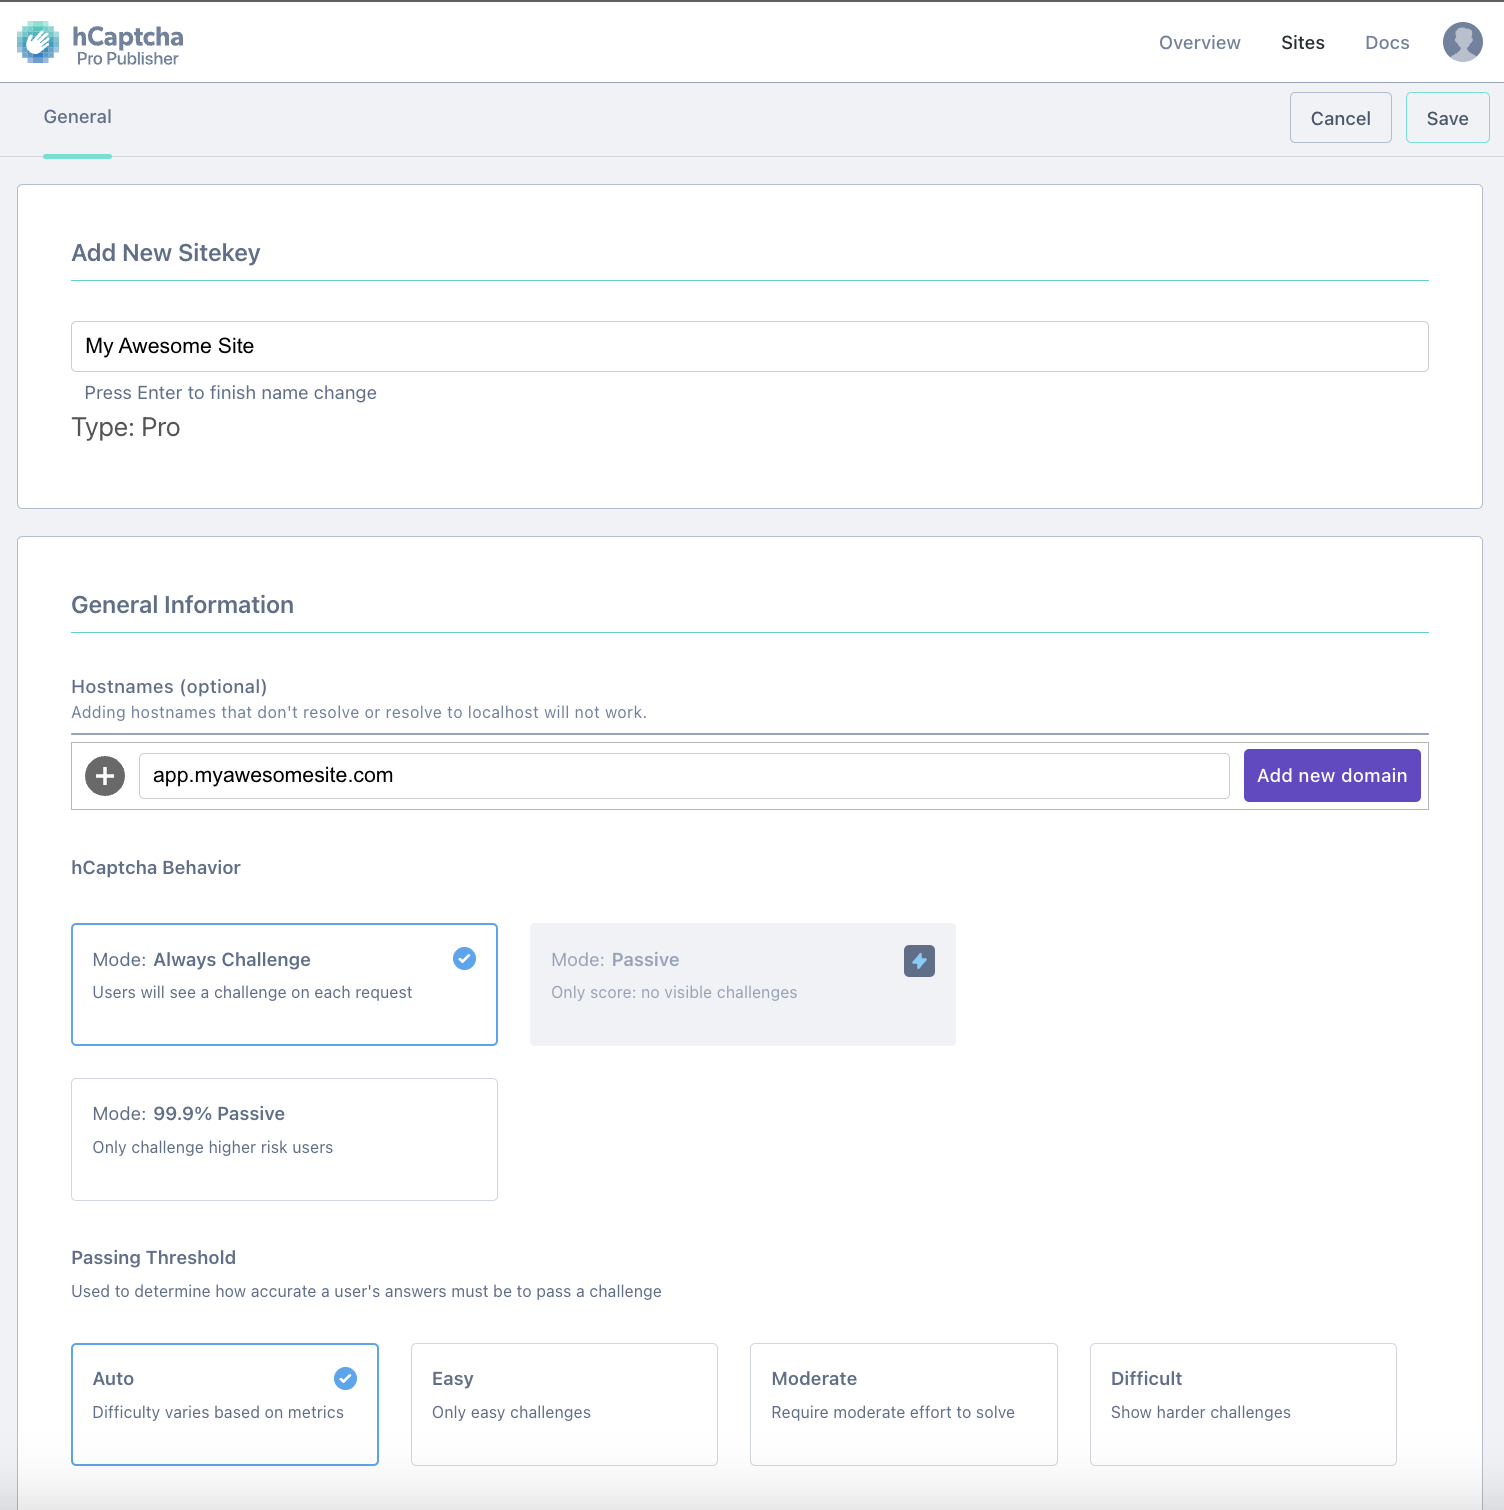
Sign up for a new account onhCaptcha - We recommend considering upgrading to the “Pro” plan, which allows for “passive” and “friction-free” modes.
Add a new site - Make sure the hostname corresponds to the domain you are using the Dynamic SDK on. For example, if you plan to set up the Dynamic SDK in app.myawesomesite.com, then you should add this value to the Hostname sections in hCaptcha.
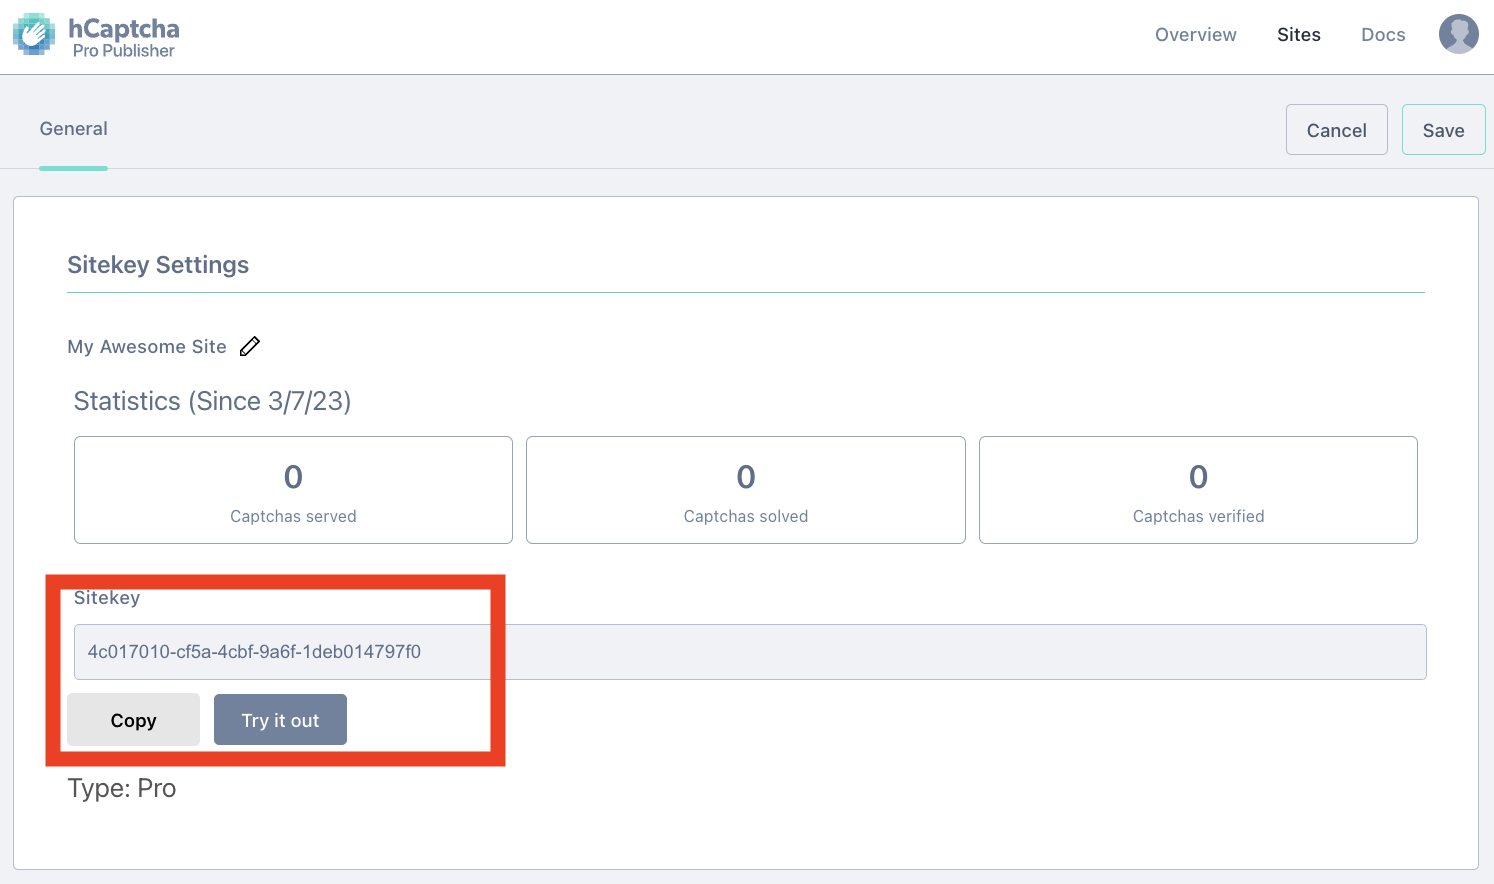
Get your site key - This is used by the Dynamic SDK to communicate with hCaptcha and display a captcha challenge before the verification step in the wallet sign-in flow. Copy this value, which we will need to set up in Dynamic.
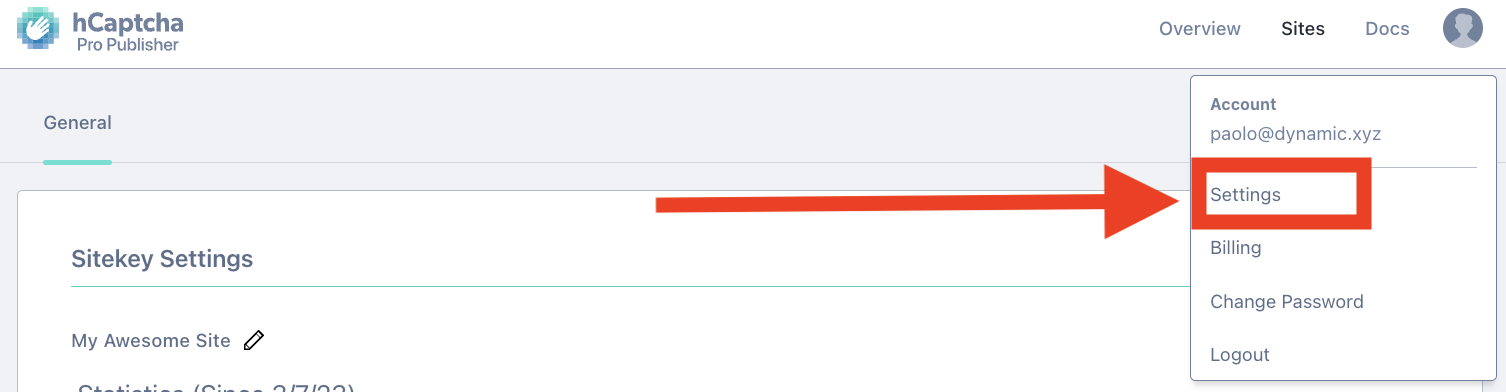
Get your secret key - This is used by the Dynamic server-side backend to verify the captcha result from the SDK, and is never leaked to the SDK. To get your secret key, click on your account profile on the upper right corner and select “Settings”. You should see your plaintext secret key, which you should also copy to set up in Dynamic.
Add the captcha provider script to your app’s index.html<head>, then call isCaptchaRequired() before sign-in. If captcha is enabled, render the widget, pass the token to setCaptchaToken, and proceed with sign-in. The SDK attaches the token to the next request automatically.